Using AWS Service Catalog
What are we going to do?
We are going to perform the following steps:
- Define a product with a version and a portfolio
- Add the source code for our product
- Provision the product subnet into a spoke account
Step by step guide
Here are the steps you need to follow to “Using AWS Service Catalog”
Define a product with a version and a portfolio
-
Navigate to the ServiceCatalogFactory CodeCommit repository
-
Open the Add file menu and click the Create file button
-
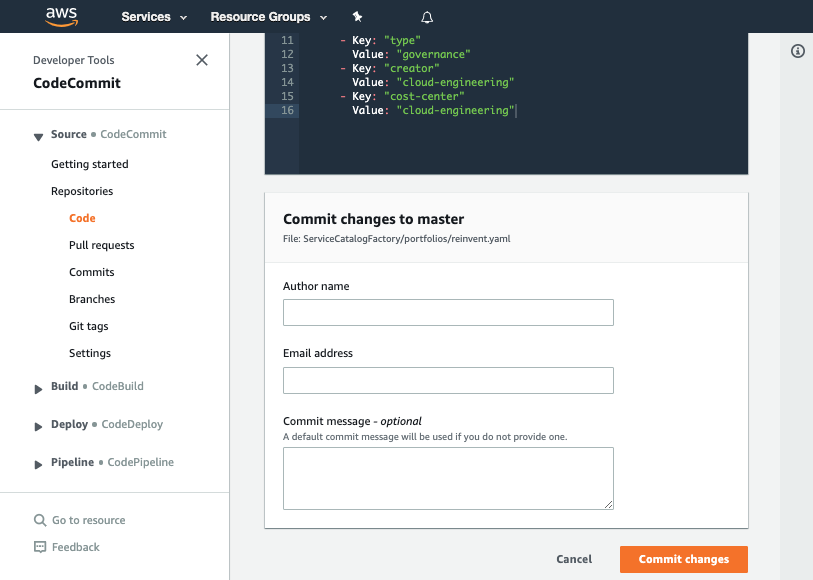
Copy the following snippet into the main input field:
Schema: factory-2019-04-01 Products: - Name: "subnet" Owner: "networking@example.com" Description: "subnet for networking" Distributor: "networking team" SupportDescription: "Speak to networking@example.com about exceptions and speak to cloud-engineering@example.com about implementation issues" SupportEmail: "cloud-engineering@example.com" SupportUrl: "https://wiki.example.com/cloud-engineering/networking/subnet" Tags: - Key: "type" Value: "governance" - Key: "creator" Value: "cloud-engineering" - Key: "cost-center" Value: "governance" Versions: - Name: "v1" Description: "v1 of subnet" Active: True Source: Provider: "CodeCommit" Configuration: RepositoryName: "subnet" BranchName: "main" Portfolios: - "mandatory" Portfolios: - DisplayName: "mandatory" Description: "Portfolio containing the mandatory networking components" ProviderName: "cloud-engineering" Associations: - "arn:aws:iam::${AWS::AccountId}:role/<INSERT YOUR ROLE NAME HERE>" Tags: - Key: "type" Value: "governance" - Key: "creator" Value: "cloud-engineering" - Key: "cost-center" Value: "governance" -
Update the Associations in the pasted text to include the IAM role name you are assuming in your account.
-
Set the File name to portfolios/networking.yaml
-
Set your Author name
-
Set your Email address
-
Set your Commit message
Using a good / unique commit message will help you understand what is going on later.
- Click the Commit changes button:
What did we just do?
The YAML file we created in the CodeCommit repository told the framework to perform several actions:
- create a product named subnet
- add a v1 of our product
- create a portfolio named networking-mandatory
- add the product: subnet to the portfolio: networking-mandatory
Verify the change worked
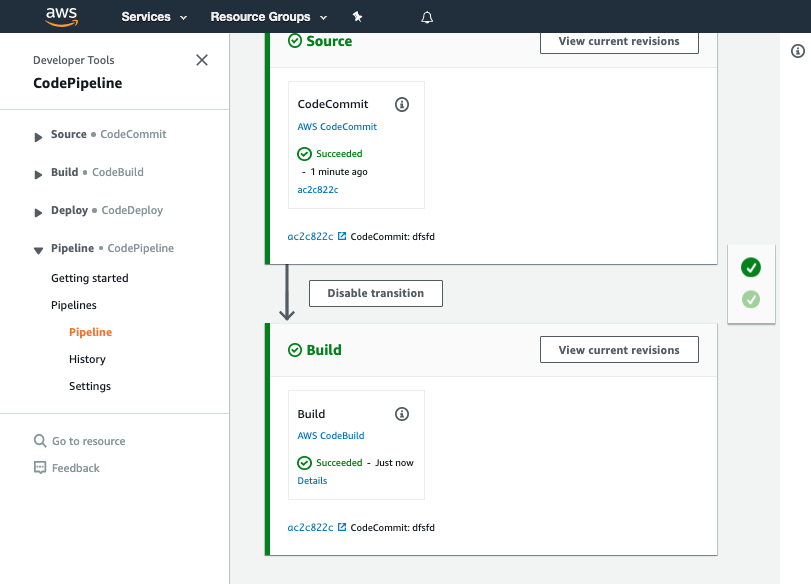
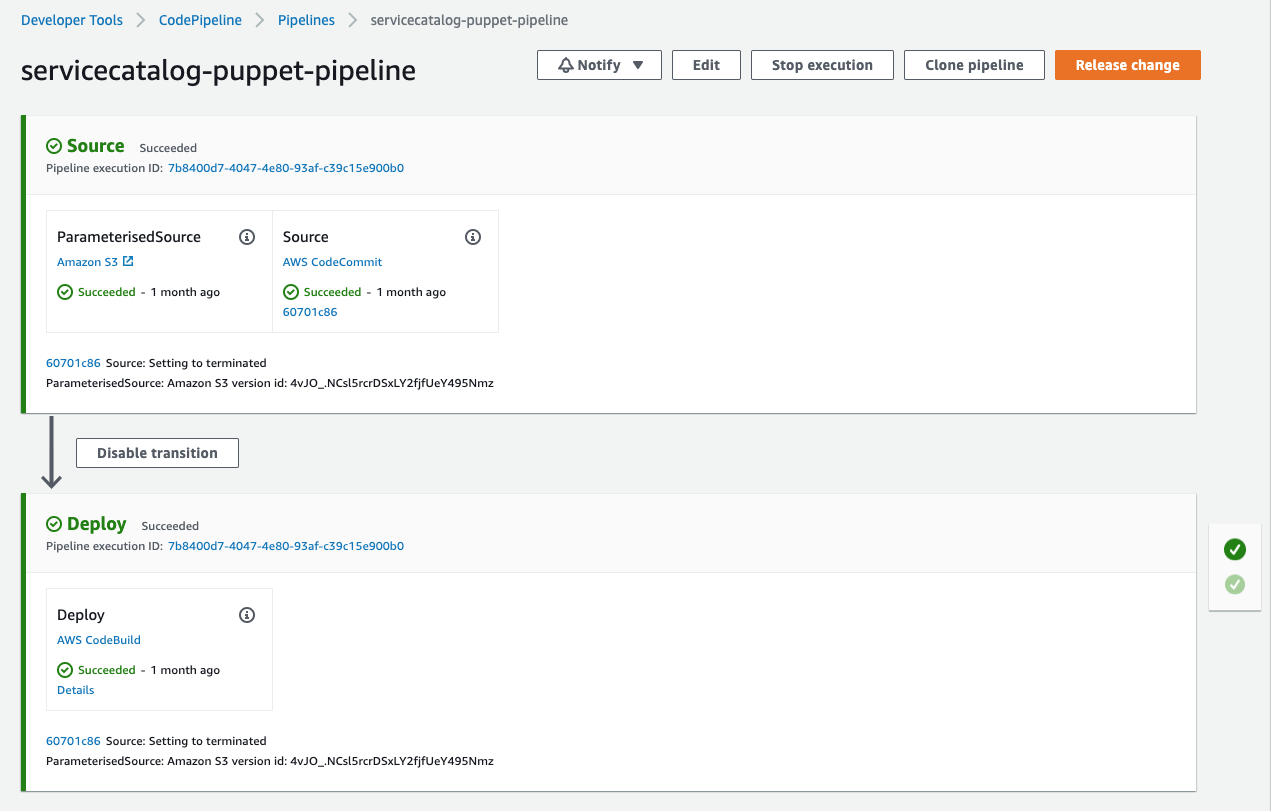
Once you have made your changes the ServiceCatalogFactory Pipeline should have run. If you were very quick in making the change, the pipeline may still be running. If it has not yet started feel free to the hit the Release change button.
Once it has completed it should show the Source and Build stages in green to indicate they have completed successfully:
Add the source code for our product
When you configured your product version, you specified the following version:
    Versions:
      - Name: "v1"
        Description: "v1 of subnet"
        Active: True
        Source:
          Provider: "CodeCommit"
          Configuration:
            RepositoryName: "subnet"
            BranchName: "main"
This tells the framework the source code for the product comes from the main branch of a CodeCommit repository of the name subnet.
We now need to create the CodeCommit repository and add the AWS CloudFormation template we are going to use for our product.
-
Navigate to AWS CodeCommit
-
Click Create repository
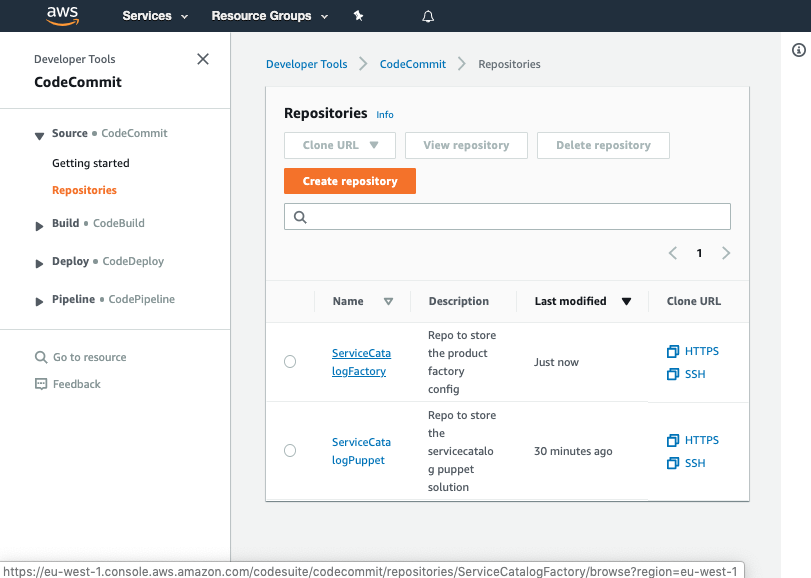
- Input the name
subnet

- Click Create

- Scroll down to the bottom of the page and hit the Create file button
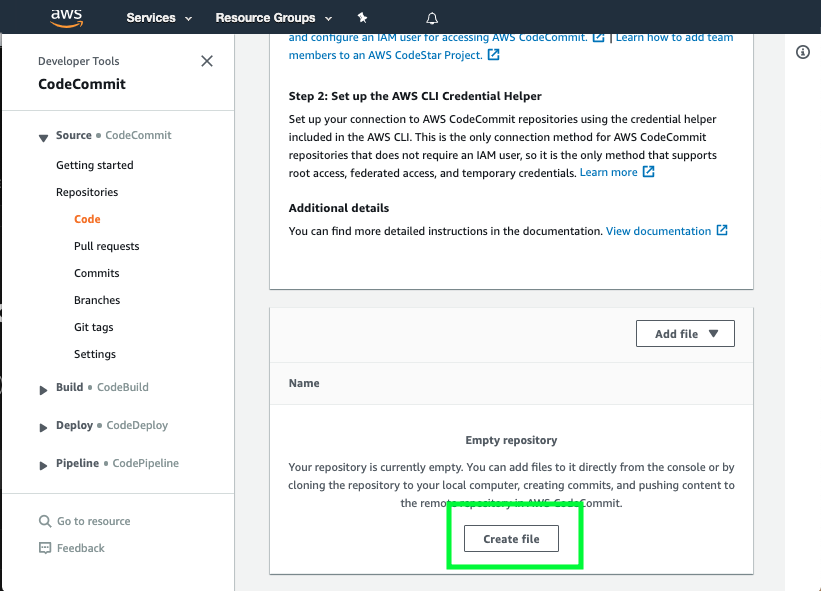
- Copy the following snippet into the main input field:
AWSTemplateFormatVersion: '2010-09-09'
Description: |
  Builds out a VPC for use
Parameters:
  SubnetCIDR:
    Type: String
    Description: |
      Subnet to use for the Subnet
  VPCID:
    Type: String
    Description: |
      VPC to create Subnet in
Resources:
  Subnet:
    Type: AWS::EC2::Subnet
    Properties:
      VpcId:
        Ref: VPCID
      CidrBlock:
        Ref: SubnetCIDR
      AvailabilityZone: !Select
          - 0
          - !GetAZs
            Ref: 'AWS::Region'
-
Set the File name to
product.template.yaml -
Set your Author name
-
Set your Email address
-
Set your Commit message
Using a good / unique commit message will help you understand what is going on later.
Creating that file should trigger your subnet-v1-pipeline.
Once the pipeline has completed it should show the stages in green to indicate they have completed successfully:
You should see your commit message on this screen, it will help you know which version of ServiceCatalogFactory repository the pipeline is processing.
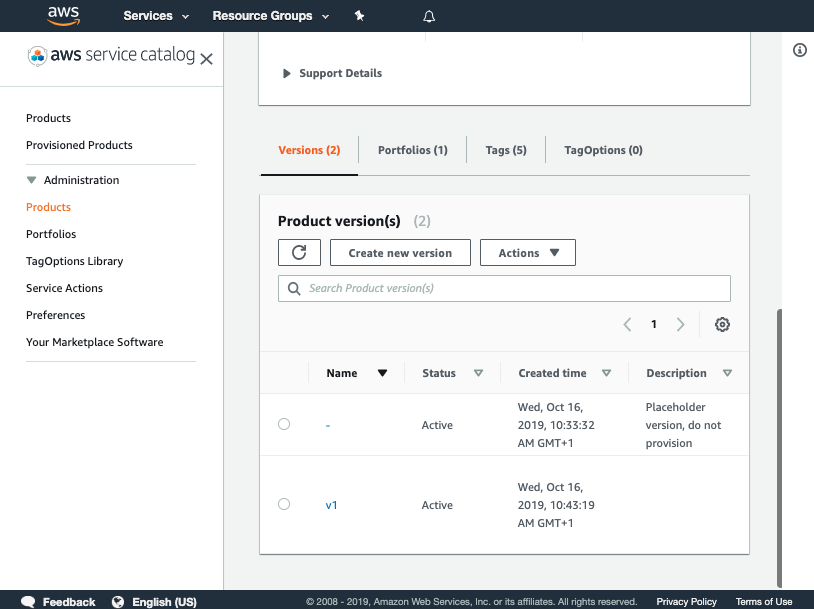
Once you have verified the pipeline has run you can go to Service Catalog products to view your newly created version.
You should see the product you created listed:
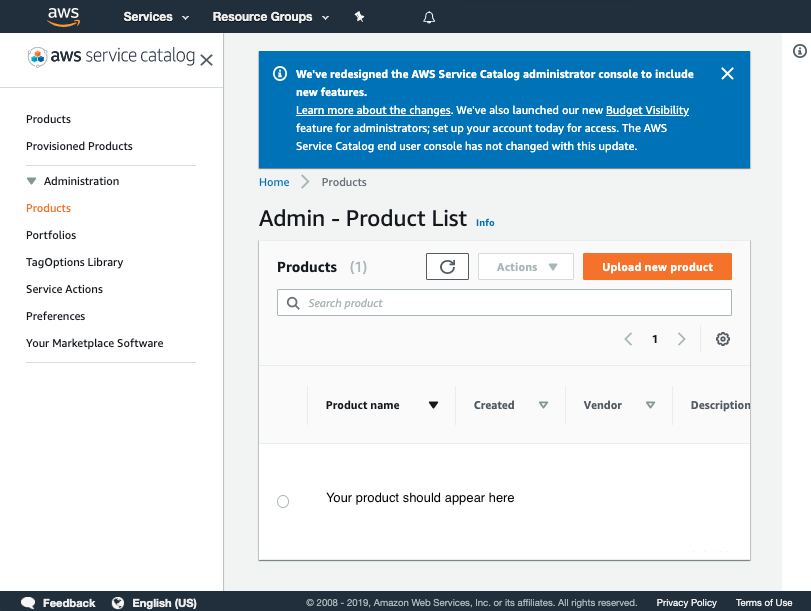
Click on the product and verify v1 is there
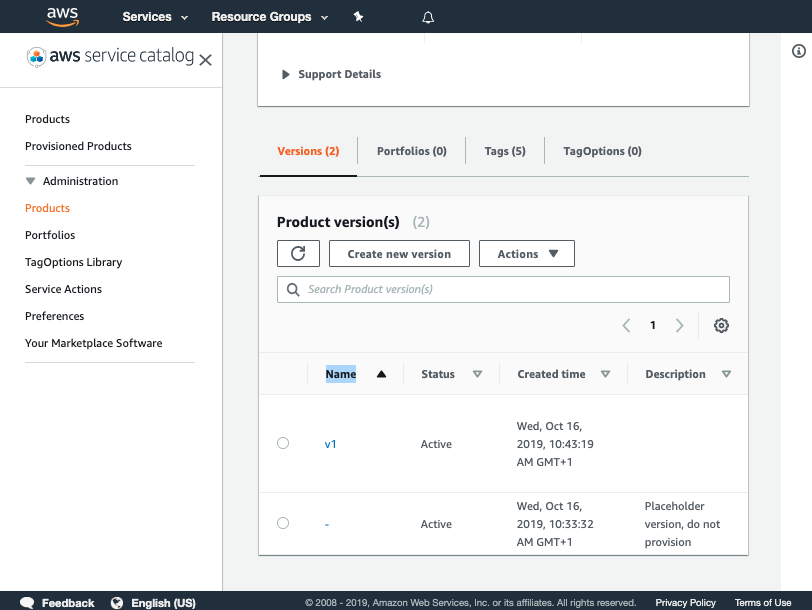
If you cannot see your version please raise your hand for some assistance
You have now successfully created a version for your product!
Verify the product was added to the portfolio
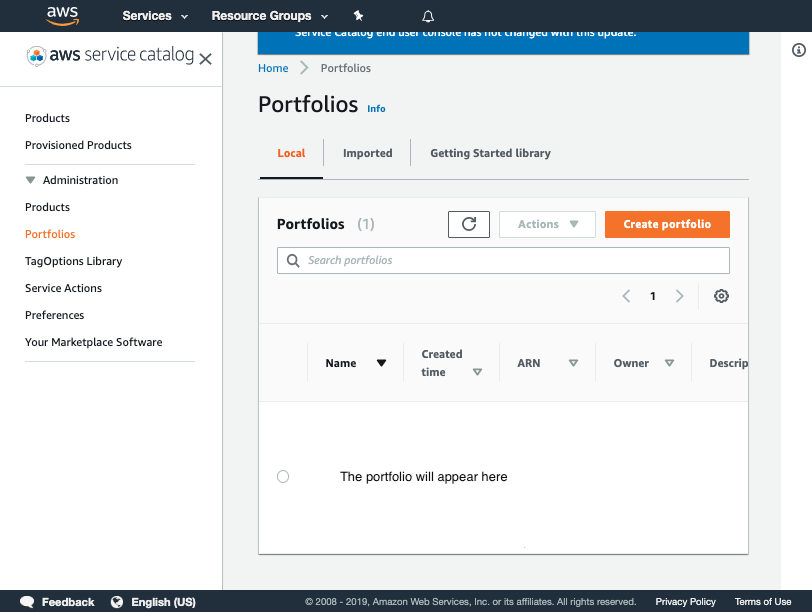
Now that you have verified the pipeline has run you can go to Service Catalog portfolios to view your portfolio.
- Click on networking-mandatory
-
Click on the product subnet
-
Click on the version v1
Provision the product subnet into a spoke account
-
Navigate to the ServiceCatalogPuppet CodeCommit repository again
-
Click on manifest.yaml
-
Click Edit
-
Append the following snippet to the end of the main input field:
launches: subnet: portfolio: "networking-mandatory" product: "subnet" version: "v1" depends_on: - name: vpc type: stack affinity: stack parameters: VPCID: ssm: name: "/networking/vpc/account-parameters/${AWS::AccountId}/${AWS::Region}/VPCId" SubnetCIDR: default: '10.0.0.0/24' deploy_to: tags: - tag: "type:prod" regions: "default_region" -
The main input field should look like this (remember to set your account_id):
accounts:
  - account_id: "<YOUR_ACCOUNT_ID_WITHOUT_HYPHENS>"
    name: "puppet-account"
    default_region: "eu-west-1"
    regions_enabled:
      - "eu-west-1"
    tags:
      - "type:prod"
      - "partition:eu"
stacks:
  delete-default-networking-function:
    name: "delete-default-networking-function"
    version: "v1"
    capabilities:
      - CAPABILITY_NAMED_IAM
    deploy_to:
      tags:
        - tag: "type:prod"
          regions: "default_region"
  vpc:
    name: "vpc"
    version: "v1"
    depends_on:
      - name: "delete-default-networking"
        type: "lambda-invocation"
        affinity: "lambda-invocation"
    deploy_to:
      tags:
        - tag: "type:prod"
          regions: "default_region"
    outputs:
      ssm:
        - param_name: "/networking/vpc/account-parameters/${AWS::AccountId}/${AWS::Region}/VPCId"
          stack_output: VPCId

lambda-invocations:
  delete-default-networking:
    function_name: DeleteDefaultNetworking
    qualifier: $LATEST
    invocation_type: Event
    depends_on:
      - name: "delete-default-networking-function"
        type: "stack"
        affinity: "stack"
    invoke_for:
      tags:
        - regions: "default_region"
          tag: "type:prod"

assertions:
  assert-no-default-vpcs:
    expected:
      source: manifest
      config:
        value: []
    actual:
      source: boto3
      config:
        client: 'ec2'
        call: describe_vpcs
        arguments: {}
        use_paginator: true
        filter: Vpcs[?IsDefault==`true`].State
    depends_on:
      - name: "delete-default-networking"
        type: "lambda-invocation"
        affinity: "lambda-invocation"
    assert_for:
      tags:
        - regions: regions_enabled
          tag: type:prod

launches:
  subnet:
    portfolio: "networking-mandatory"
    product: "subnet"
    version: "v1"
    depends_on:
      - name: vpc
        type: stack
        affinity: stack
    parameters:
      VPCID:
        ssm:
          name: "/networking/vpc/account-parameters/${AWS::AccountId}/${AWS::Region}/VPCId"
      SubnetCIDR:
        default: '10.0.0.0/24'
    deploy_to:
      tags:
        - tag: "type:prod"
          regions: "default_region"
Committing the manifest file
- Set your Author name
- Set your Email address
- Set your Commit message
Using a good / unique commit message will help you understand what is going on later.
- Click the Commit changes button:
What did we just do?
The YAML file we created in the previous step told the framework to perform the following actions:
- provision a product named subnet into the default region of the account
When you added the following:
launches:
  subnet:
    portfolio: "networking-mandatory"
    product: "subnet"
    version: "v1"
    depends_on:
      - name: vpc
        type: stack
        affinity: stack
    parameters:
      VPCID:
        ssm:
          name: "/networking/vpc/account-parameters/${AWS::AccountId}/${AWS::Region}/VPCId"
      SubnetCIDR:
        default: '10.0.0.0/24'
    deploy_to:
      tags:
        - tag: "type:prod"
          regions: "default_region"
You told the framework to provision v1 of subnet from the portfolio networking-mandatory into every account that has the tag type:prod
accounts:
  - account_id: "<YOUR_ACCOUNT_ID_WITHOUT_HYPHENS>"
    name: "puppet-account"
    default_region: "eu-west-1"
    regions_enabled:
      - "eu-west-1"
    tags:
      - "type:prod"
      - "partition:eu"
Within each account there will be a copy of the product provisioned into the default region:
accounts:
  - account_id: "<YOUR_ACCOUNT_ID_WITHOUT_HYPHENS>"
    name: "puppet-account"
    default_region: "eu-west-1"
    regions_enabled:
      - "eu-west-1"
    tags:
      - "type:prod"
      - "partition:eu"
Verifying the provisioned product
Once you have made your changes the ServiceCatalogPuppet Pipeline should have run. If you were quick in making the change, the pipeline may still be running. If it has not yet started feel free to the hit the Release change button.
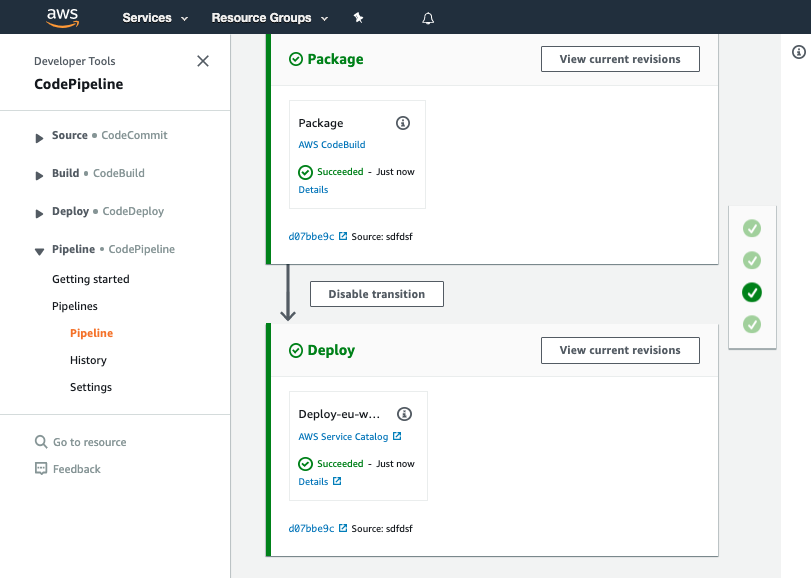
Once it has completed it should show the stages in green to indicate they have completed successfully:
Once you have verified the pipeline has run you can go to Service Catalog provisioned products to view your provisioned product. Please note when you arrive at the provisioned product page you will need to select account from the filter by drop down in the top right:
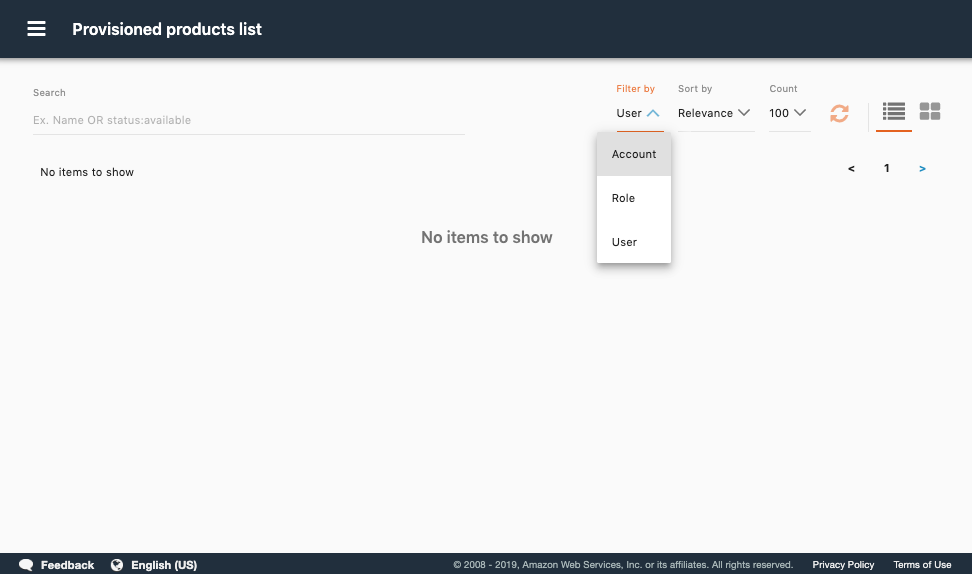
You have now successfully provisioned a product