Adding Accounts using Organizational Units (OU)
What are we going to do?
This tutorial will walk you through “Adding Accounts using Organizational Units (OU)".
We are going to perform the following steps:
- create a manifest file
- add accounts to the manifest file using AWS Organizations OU
- add a spoke-local-portfolios to the manifest file
During this process you will check your progress by verifying what the framework is doing at each step.
Step by step guide
Here are the steps you need to follow to “Adding Accounts using Organizational Units (OU)”
Creating the manifest file
-
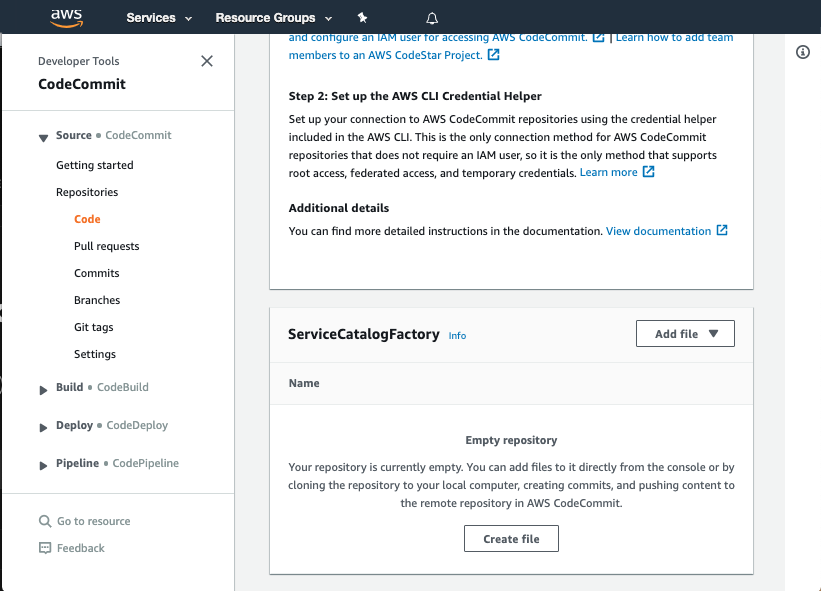
Navigate to the ServiceCatalogPuppet CodeCommit repository
-
Scroll down to the bottom of the page and hit the Create file button
Adding an OU to the manifest file
This will allow you to provision AWS Service Catalog Products into multiple AWS Accounts and Regions across your AWS estate without listing individual AWS 12-digit Account IDs. Instead we will supply the AWS Organizations OU Path. Service Catalog Products will then be provisioned in AWS Accounts that are a member of this OU.
We will start out by adding your OU to the manifest file.
-
Navigate to the ServiceCatalogPuppet CodeCommit repository
-
Scroll down to the bottom of the page and hit the Create file button
-
Copy the following snippet into the main input field:
accounts: - ou: "<YOUR_OU_OR_PATH>" name: "application-accounts" default_region: "eu-west-1" regions_enabled: - "eu-west-1" - "eu-west-2" tags: - "type:prod" - "partition:eu" -
Update
<YOUR_OU_OR_PATH>to be your OU or OU Path which contains member accounts- for example:
/production/application-accounts
- for example:
The framework will list the AWS Accounts in your OU and expand the manifest automatically.
For example, if your OU were to contain AWS Accounts: 0123456789010 and 0109876543210, then the expanded manifest file will look like this:
accounts:
  - account_id: 0123456789010
    name: '<YOUR_ACCOUNT_NAME>'
    default_region: "eu-west-1"
    regions_enabled:
      - "eu-west-1"
      - "eu-west-2"
    tags:
      - "type:prod"
      - "partition:eu"
  - account_id: 0109876543210
    name: '<YOUR_ACCOUNT_NAME>'
    default_region: "eu-west-1"
    regions_enabled:
      - "eu-west-1"
      - "eu-west-2"
    tags:
      - "type:prod"
      - "partition:eu"
Adding spoke-local-portfolio to the manifest
Now we are ready to add a product to the manifest file.
- Add the following snippet to the end of the main input field:
spoke-local-portfolios:
  account-vending-for-spokes:
    portfolio: "reinvent-cloud-engineering-governance"
    deploy_to:
      tags:
        - tag: "type:prod"
          regions: "default_region"
- The main input field should look like this:
accounts:
  - ou: "<YOUR_OU_OR_PATH>"
    name: "application-accounts"
    default_region: "eu-west-1"
    regions_enabled:
      - "eu-west-1"
      - "eu-west-2"
    tags:
      - "type:prod"
      - "partition:eu"
spoke-local-portfolios:
  account-vending-for-spokes:
    portfolio: "reinvent-cloud-engineering-governance"
    deploy_to:
      tags:
        - tag: "type:prod"
          regions: "default_region"
Committing the manifest file
Now that we have written the manifest file we are ready to commit it.
-
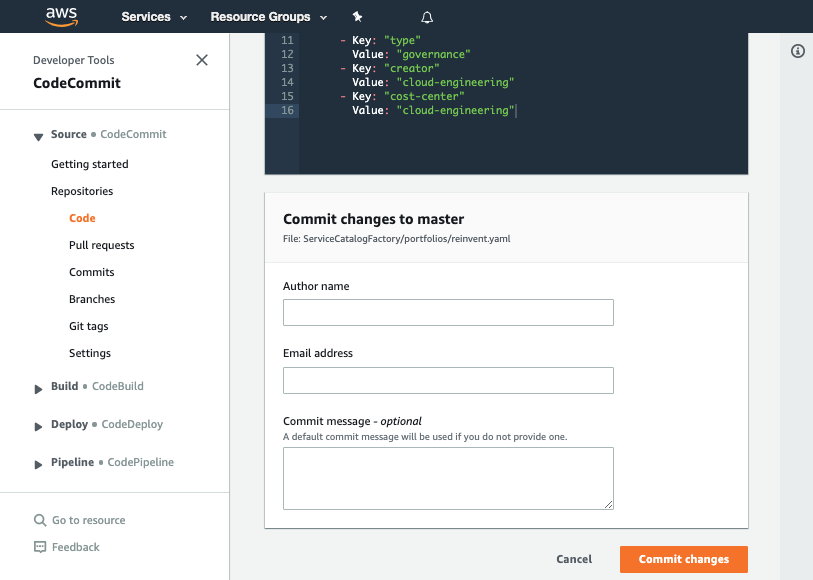
Set the File name to
manifest.yaml -
Set your Author name
-
Set your Email address
-
Set your Commit message
Using a good / unique commit message will help you understand what is going on later.
- Click the Commit changes button:
Verifying the sharing
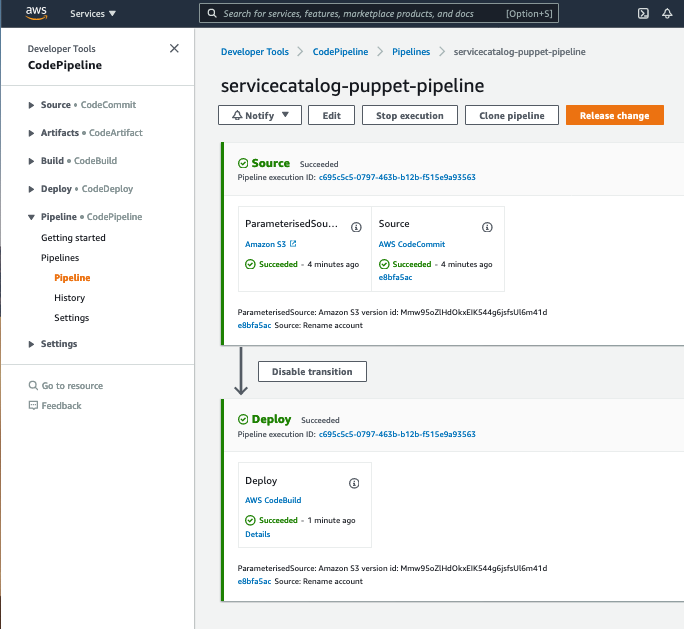
Once you have made your changes the ServiceCatalogPuppet Pipeline should have run or if you were quick may still be running. If it has not yet started feel free to the hit the Release change button.
Once it has completed it should show the Source and Deploy stages in green to indicate they have completed successfully:
Once you have verified the pipeline has run you can go to Service Catalog portfolios in the member account to view your shared product.
When you share a portfolio the framework will decide if it should share the portfolio. If the target account is the same as the factory account it will not share the portfolio as it is not needed.